This device recomended itself as very flexible and configurable thing. I configured this device for one small office with 5-6 employees. As a result this device replaced hardware server with asterisk inside.
Important notice Device should have firmware version >= 6.1.12(XU). Otherwise you won’t see this options
At first we need to login to web-ui of device with administrator privileges. Clicking on button Advanced.
Then we need to go to Voice tab and find channel T1. You need to feel fields with information you got from your SIP provider: sip server, credentials etc.
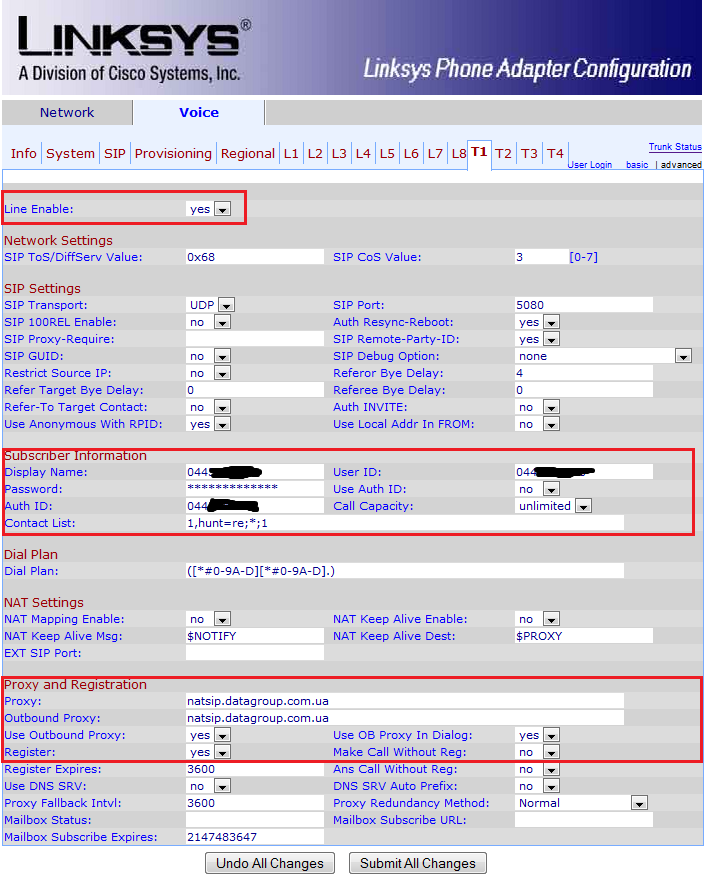
On screenshot you can see example of configuration for ukrainian ISP DataGroup. But settings could be adjusted to requirements of your SIP provider.
Option Contact List describes how inbaund call would be processed. By default it is round-robin on all lines. In my configuration call would be sent to reception phone connected to line 1. Here is config for this:
1,hunt=re;*;1
Now we need to configure internal lines. In example you can see configuration for line L1. Далее переходим в настройки линии, к которой подключен аппарат. Допустим это будет первая линия L1.
In parameter Trunk Group we need to specify number of SIP trunk configured before. It would be used for outbaund calls.
Now repeat same steps for all line and apply settings.
For internal calls you can enter just 1, 2, 3 etc. This is not really correct. So we can create sort of dial-plan to extend our internal numbers. In my example I used mask 70X for internal calls.
(*xx|[3469]11|0|00|[2-9]xxxxxx|1xxx[2-9]xxxxxxS0|xxxxxxxxxxxx.|<70:>x|00[1-9].)
Mask <70:>x remove prefix 70 from your internal number and your call goes to physical line number.
So now you have simple PBX device for small office or home.